
All About Getting a Pop Up Electrical Outlet on Your Kitchen Countertop
All About Getting a Pop-Up Electrical Outlet on Your Kitchen Countertop
If your kitchen island sits like an island in more ways than one — surrounded by workspace but with nowhere to plug anything in — a pop-up electrical outlet is the most elegant fix you probably haven't heard of yet. Our electricians have been installing them in Vancouver kitchens for years, and the difference they make to daily kitchen life is hard to overstate.
Modern kitchens run on appliances: grinders, food processors, stand mixers, blenders, air fryers, and the phone you keep trying to charge between tasks. Getting power where you actually need it — without a tangle of extension cords running across the counter — is exactly what a pop-up outlet solves. Here is everything you need to know before calling us to install one.
How Is a Pop-Up Electrical Outlet Installed in Your Kitchen Countertop?

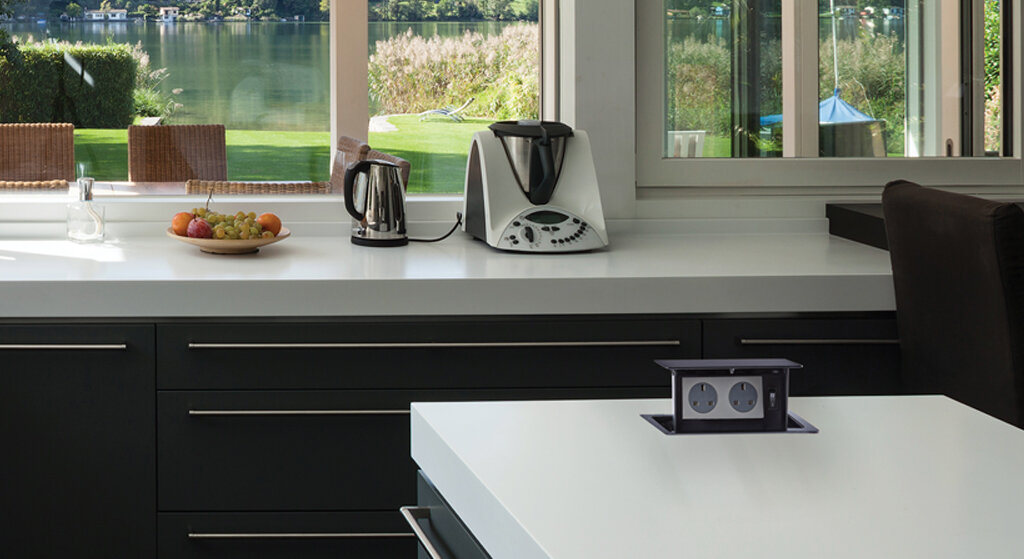
A pop-up electrical outlet is a power unit that sits concealed flush within your countertop or kitchen island surface. Press or rotate the top and it rises to reveal sockets — often two to six power outlets along with USB-A or USB-C ports, depending on the model. When you are done, it tucks back down out of sight, leaving your countertop clean and uninterrupted.
They have become increasingly popular, particularly during kitchen remodels, because they solve one of the most common complaints about kitchen design: there is never a power outlet right where you need one. Installing one is a job for a licensed electrician — here is the process.
Selecting the Right Spot
The first decision — and in many ways the most important one — is where the outlet goes. The practical answer is wherever you keep your appliances: the countertop with the most workspace, or the kitchen island if you have one. Avoid anywhere near the sink, dishwasher, or stove; moisture and heat are not friends to electrical outlets of any kind.
There is also a compliance angle. The National Electrical Code requires an outlet within the first 9 square feet of countertop, with additional outlets for every 18 square feet beyond that. Larger kitchens may need two or three units spaced across the counter. Placement also determines wiring distance — the further your chosen spot from the nearest wall outlet, the more wiring is required, and the higher the installation cost.
Making the Opening
Once the location is confirmed, the electrician cuts a precise opening in your countertop for the unit housing. This part requires patience and the right tools — a sloppy cut on a stone or wood countertop is both expensive and heartbreaking to fix.
Precision here depends entirely on having the actual unit to measure from. The cutout needs to be sized just right — too tight and the unit cannot be seated properly; too loose and there is a gap around the rim. Your electrician dry-fits the unit before any wiring happens to confirm the opening is correct.
Wiring It Up and Locking It In
This is where experience matters most. The wiring runs from the pop-up unit, concealed beneath the countertop surface, back to the nearest wall outlet which serves as the power receptacle. The electrician connects the unit's wires to the wall outlet's existing wiring — which involves opening the wall outlet, understanding the existing circuit load, and making secure connections.
There is one non-negotiable here that the NEC makes clear: a ground fault circuit interrupter (GFCI) must be installed with every pop-up kitchen outlet. GFCI protection detects any ground fault or short circuit and cuts power within milliseconds — essential in a kitchen environment where steam, spills, and water are part of daily life. Our electricians always install this as a standard part of the job.
How Is the Pop-Up Outlet Tested After Installation?
A good electrician does not pack up their tools and leave the moment the unit is in the countertop. Testing is part of the job — and it is worth making sure yours does it properly.
Circuit load test: Appliances are plugged in one at a time and switched on to determine how much load the circuit can handle before the breaker trips. If the breaker trips at one or two appliances, the circuit breaker may need upgrading.
Pop-up mechanism: The physical mechanism is tested — the unit should pop up and retract smoothly, with no sticking or partial deployment.
Wall socket integrity: The wall outlet acting as the receptacle is inspected for loose wiring or signs of heat damage. Kitchen outlets take a lot of abuse from moisture and heat over the years — it costs almost nothing to replace a questionable one while the electrician is already on site.
If the circuit trips under normal appliance use, this usually points to one of two things: either the existing circuit is shared with too many other loads, or the breaker itself is undersized. Our electricians can advise on whether a dedicated circuit or breaker upgrade makes sense for your kitchen setup.
↑ Back to topWhy You Shouldn't Install a Pop-Up Outlet Yourself
A pop-up outlet installation looks deceptively manageable on YouTube. The reality is more nuanced. There is the cutting, which requires precision that most DIYers underestimate — countertop stone, engineered wood, and composite materials each behave differently under a blade. Then there is the wiring, which involves working on a live circuit unless you know how to properly isolate it first.
An incorrect wire connection can cause a short circuit that overheats the entire circuit wiring in your kitchen — not just the outlet itself. Worse, without proper GFCI protection installed correctly, a ground fault near a water source could be fatal. In British Columbia, kitchen electrical work requires a permit and inspection through Technical Safety BC. Unpermitted work can void your home insurance and create serious problems at the time of a sale.
We have been called in to fix DIY pop-up outlet installations a few times. In every case, the homeowner had done the physical installation correctly — the unit looked great — but the wiring behind it was problematic. One had the live and neutral wires reversed. Another had no GFCI protection at all. Neither was visible from the outside. A licensed electrician is fast, relatively inexpensive for what is involved, and removes all of those risks. Book a consultation →
Reasons to Get Your Pop-Up Electrical Outlet Installed Right Away

Still on the fence? These are the reasons homeowners across Vancouver end up calling us after months of thinking about it.
Kitchen Islands Now Have Their Own Electrical Code
Most states and provinces are updating their building codes to require pop-up outlets in kitchen islands rather than traditional side-mounted wall sockets. Getting ahead of this now — especially if you are planning any kitchen renovation — means your island will be code-compliant from day one.
Wall Outlets Eat Into Your Available Space
The NEC requires a wall outlet every 48 inches of counter run. That places outlets behind your sink, near your stove, and in awkward spots — each requiring clearance distances that shrink your practical workspace. A pop-up outlet on the island frees you from those spatial constraints.
No More Cord Clutter
Extension cords draped across kitchen counters are a trip hazard and a burn risk near the stove. Dangling appliance cords are a hazard for children. A pop-up outlet on your island or countertop puts power exactly where the appliances are — cords stay short, tidy, and out of the way.
Charge Your Phone While You Cook
Most pop-up kitchen outlets include USB-A and USB-C charging ports. Your phone charges on the counter right next to you — not across the kitchen plugged into a wall outlet you can barely see. Some newer models even include wireless charging pads built into the surface.
Install That Backsplash You Have Always Wanted
Wall outlets positioned behind a cooking range are one of the most common reasons people cannot install a full backsplash. Remove the wall outlet from that spot, replace it with a pop-up on the island, and suddenly the entire wall is available for tile, stone, or whatever backsplash you have been holding back on.
More Sockets, More Flexibility
A standard wall outlet gives you two sockets. A pop-up outlet gives you two to six, plus USB ports. Running a stand mixer, food processor, and kettle at the same time — without unplugging anything — is the kind of low-stakes convenience that makes a real difference on a busy morning.
What Our Vancouver Electricians Recommend
If you are planning a kitchen renovation or remodel, adding a pop-up outlet is one of the highest-value electrical upgrades you can make — and the right time to do it is during the renovation, before the countertops are finished. Retrofitting after the fact is entirely doable, but it is harder and costs a bit more.
A few things worth knowing before you book:
✓ Buy the pop-up unit before we arrive — we will measure and confirm fit before cutting
✓ Note where you most often use appliances — that is where the outlet should go
✓ Keep it at least 12–18 inches from the sink and away from the stove
✓ If adding to an island, consider a two-socket model with USB ports for maximum utility
✓ Ask us about circuit capacity — older kitchen circuits may benefit from a breaker upgrade alongside the installation
Related services from our team:
Related reading: Remodeling in 2026? Don't Overlook These Electrical Considerations | Electrical Wiring for Basement Suites | 10 Overlooked Electrical Mistakes Homeowners Make
↑ Back to topReady to Add a Pop-Up Outlet to Your Kitchen?
Our licensed electricians serve Vancouver and the entire Lower Mainland. We handle everything — permit, wiring, GFCI, and testing — so you just enjoy the result.
Book a Free Consultation →Serving All of Greater Vancouver
Common questions about pop-up kitchen outlets — answered by our licensed Vancouver electricians.